So Just bought yourself a DSLR and it feels like Christmas, unpacking it from the box, but you are stunned by the number of buttons and dials plugs maybe even lenses and you just flick it onto ‘Auto’ and start shooting and that’s where you have stayed. The histogram screen you've probably only worked out how to get off that screen. But for some it may not be long until you crave a little creative and others finally wanting to get out of auto zone as that photo they’ve seen which inspired the purchase of a DSLR in the first place long forgotten, but how and where to begin?
Considering yourself a beginner who is unsure of how to make the most of your camera, this video is designed for you. It’s a brief clip to help you take your camera off auto. It isn’t intended to be a replacement for your camera manual, so will not explain every last setting in great depth, but will cover enough of the basics to get you in control of your camera, and give you the key topics to go back to your manual to read.
The steps for learning How to Use Your DSLR will be a Part 2 video for any one on watching in up YouTube another if you are a lucky person who has order my DVD think is the description.
Video 1 will be about;
Master Shooting modes (including priority modes and full manual) I will leave effects for you own discovery.
Understand ISO (Meaning International Organization of Standardization) also pronounced eye-sew.
Video 2 will be about;
Learn about White balance
Metering including exposure compensation
Learn About Focusing
Understand file size/types
Histogram
There’s lots to learn if you want to get the most from your DSLR but let’s started.
Record the just the camera (so you can read & not worry about looking into the camera)
Video 1
1. Master Shooting modes
The best place to start is with the shooting modes. The shooting modes will most likely be found on a dial labelled with ‘auto, auto flash, A, S, P, M’ I will leave stop, portrait and effects for you own discovery. Selecting a shooting mode will determine how your camera behaves when you press the shutter, for example, when ‘auto’ is selected, the camera will determine everything to do with the exposure. The other modes, ‘A for Aperture, S for Shutter, P for Program, M for full manual’ are there to give you the control.
Don’t worry if your mode dial looks a little different; different manufacturers use different abbreviations for the shooting modes. Your mode dial may have the letters ‘Av, Tv, P, M yet they all function in the same way. Below, I have given each abbreviation for the given mode.
Aperture Priority (Av or A)
When this is selected, you as the photographer set the aperture and the camera will automatically select the shutter speed.
The aperture is the size of the opening in the lens through which light is allowed to pass whenever the shutter is opened – the larger the aperture, the more light passes through but it also controls the depth of field.
The aperture is measured in ‘f-stops’ and is usually displayed using an ‘f-number’, e.g. f/5.6, f/8.0 f/22 etc, which is a ratio of focal length over diameter of the opening. Therefore, a larger aperture (a wider opening) has a smaller f-number (e.g. f/2.8) and smaller aperture (a narrower opening) has a larger f-number (e.g. f/22).
Aperture is one of the most important aspects of photography as it directly influences the depth of field – that is, the amount of an image that is in focus. A large depth of field (achieved by using a small aperture large f-number) would mean that a large distance within the scene is in focus, such as the foreground to the background of the landscape below.
An aperture of f/11 was used here to give a large depth of field, ensuring that the whole image, from the foreground rocks to the Background of the hills and the jetty was sharp.
Whereas a shallow depth of field (achieved by using a large aperture small f-number) would produce an image where only the subject is in sharp focus, but the background is soft and out of focus. This is often used when shooting portraiture or wildlife, to isolate the subject from the background:
A large aperture of f/5.6 was used to capture this snow monkey, to create a soft out of focus background.
So when using aperture priority, you can get complete control over your depth of field, whilst the camera takes care of the rest.
Shutter Priority (S or TV)
Similarly to aperture priority, this is another ‘semi-automatic’ shooting mode, though in this instance, you as the photographer set the shutter speed and the camera will take care of the aperture. The shutter speed, measured in seconds (or more often fractions of a second), is the amount of time the shutter stays open when taking a photograph. The longer the shutter stays open, the more light passes through to the sensor to be captured.
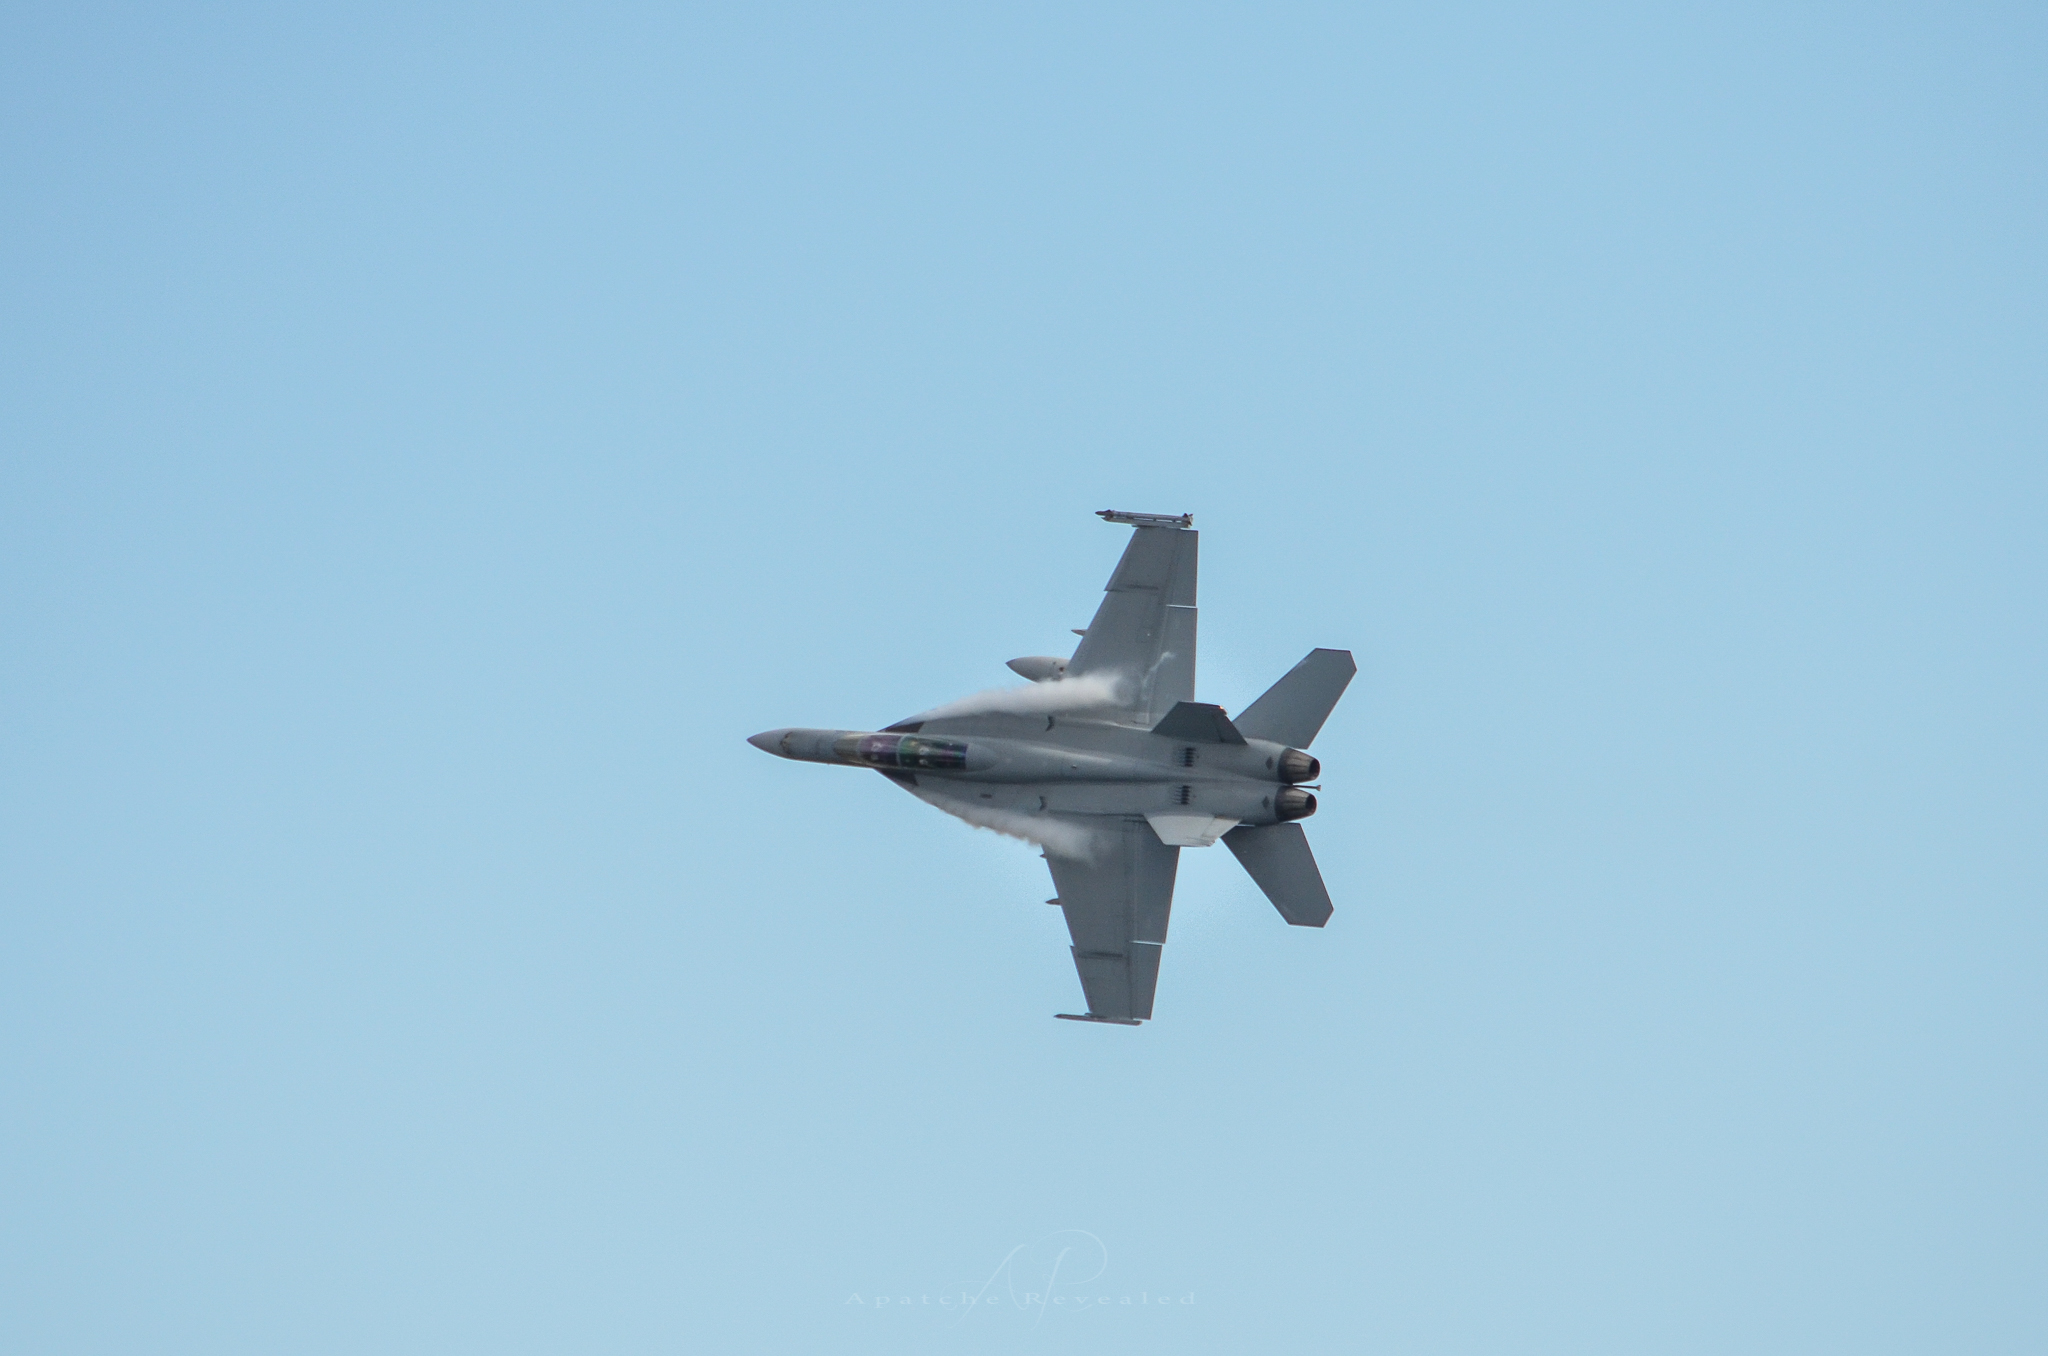
You would select a short shutter speed if you wanted to freeze a fast moving subject, such as shooting sports, action or wildlife, for example:
A very fast shutter speed of 1/2000th seconds was used to freeze the motion of this F11 Hornet in flight
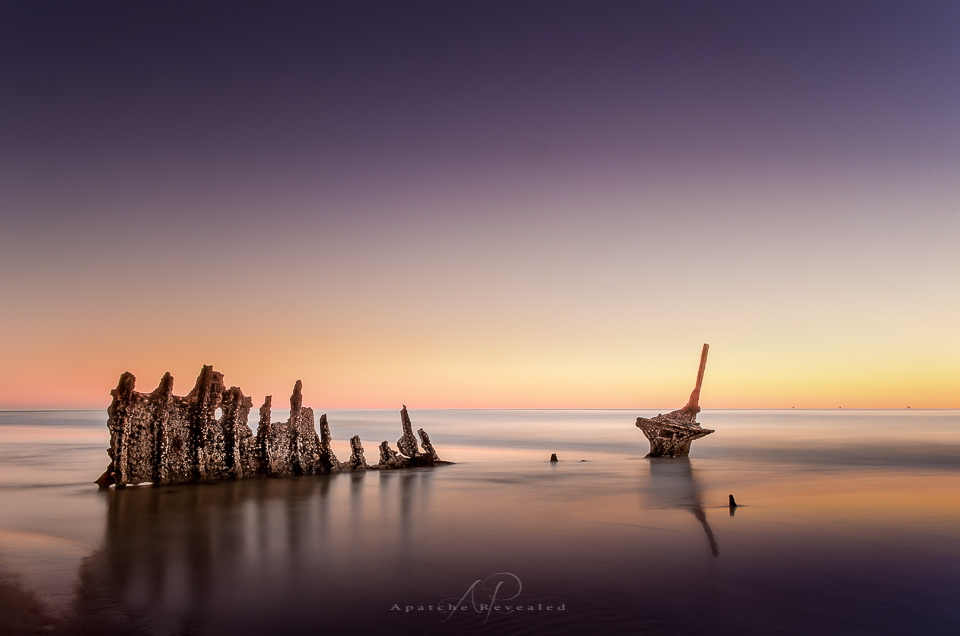
You would use a long shutter speed if you wanted to blur a moving subject, for example water rushing over a waterfall (slower shutter speeds will require you to put the camera on a tripod to ensure the camera is held steady whilst the shutter is open).
To capture a soft motion to blur the waves out, a shutter speed of 25 seconds was used here on the SS Dicky shipwreck.
So whilst you worry about what shutter speed you need for a given photograph, the camera will determine the appropriate aperture required to give the correct exposure.
Aperture and shutter priority shooting modes may be semi-automatic, meaning that some may deride their use because they’re not fully manual, however they are incredibly useful modes to shoot in that can give you enough creative control to capture scenes as you envisage them.
Program (P)
Program mode is almost a halfway house between the semi automatic modes of aperture/shutter priority and full manual control. In program mode, you are able to set either the aperture or shutter speed, and the camera will maintain the correct exposure by adjusting the other one accordingly, i.e. as you change the aperture, the shutter speed will automatically change, and vice versa. This gives you additional freedom that using either aperture priority or shutter priority cannot give without switching between shooting modes.
Manual (M)
Manual mode is exactly what it sounds like, you are given full control over the exposure determination, setting both the aperture and shutter speed yourself. There will be an exposure indicator either within the viewfinder or on the screen that will tell you how under/over exposed the image will be, however, you are left to change the shutter speed and aperture yourself to ensure you achieve the correct exposure.
Practically Speaking: as a first step to taking your camera off ‘auto’, aperture priority and shutter priority modes offer two very simple ways to start to understand how the different setting impact your images and are a perfect starting place for learning how to use your camera more creatively.
Understand ISO
ISO is a measure of how sensitive the sensor of your camera is to light. The term originated in film photography, where film of different sensitivities could be used depending on the shooting conditions, and it is no different in digital photography. The ISO sensitivity is represented numerically from ISO 100 (low sensitivity) up to ISO 6400 (high sensitivity) and beyond, and controls the amount of light required by the sensor to achieve a given exposure
At ‘low’ sensitivities, more light is required to achieve a given exposure compared to high sensitivities where less light is required to achieve the same exposure. To understand this, let’s look at two different situations:
Low ISO numbers
If shooting outside, on a bright sunny day there is a lot of available light that will hit the sensor during an exposure, meaning that the sensor does not need to be very sensitive in order to achieve a correct exposure. Therefore, you could use a low ISO number, such as ISO 100 or 200. This will give you images of the highest quality, with very little grain (or noise).
Taken at ISO 100, the image does not show signs of noise even when looking at the 100% crop (right)
High ISO numbers
If shooting in low light conditions, such as inside a dark cathedral, caves or night photography for example, there is not much light available for your camera sensor. A high ISO number, such as ISO 3200, will increase the sensitivity of the sensor, effectively multiplying the small amount of available light to give you a correctly exposed image. This multiplication effect comes with a side effect of increased noise on the image, which looks like a fine grain, reducing the overall image quality. The noise will be most pronounced in the darker/shadow regions.
This image was taken as the sun was going down around 4pm, meaning there was not much ambient light. Therefore, this was shot with ISO 3000, however you can see very obvious noise in the 100% crop (right)
Practically Speaking: you want to keep the ISO as low as possible, as the lower the ISO, the less noise and the higher the quality of the resulting image. Outside on a sunny day, select ISO 200 and see how it goes. If it clouds over, maybe select an ISO between 400-800. If you move indoors, consider an ISO of around 1600 or above (these are approximate starting points).
Most digital SLRs now have an ‘auto-ISO’ function, where the camera sets the ISO depending upon the amount of light in which you are shooting, keeping it as low as possible. Auto-ISO is a very useful tool when starting out with your camera, as it is allows you to define an upper limit i.e. where the images become too noisy such as ISO 1600 or 3200, and then forget about it until situations where you specifically want to override the automatic setting, for example if taking landscape images using a tripod, you can afford to use the lowest ISO possible.
Video 2
7. Learn about White balance
If shooting in jpeg, as recommended above, you will need to make sure you set your white balance before taking a picture. The white balance can significantly impact colour tone of your photographs. You may have noticed that sometimes your images have a blueish tone to them or, in others, everything looks very orange. This is to do with the white balance and, whilst you can make some adjustments to the image on your computer, it is much simpler if you get it right up-front.
Different light sources (such as the sun, light bulbs, fluorescent strips etc) emit light of different wavelengths, and therefore colours, which can be described by what is known as colour temperature. Light from a candle, or from the sun during sunrise/sunset, is very warm, and contains a lot of red/orange wavelengths; whereas light from a fluorescent strip is much cooler, containing a lot of blue wavelengths. This coloured light is reflected off of surfaces, but our brain in clever enough to recognize this and automatically counter the effect, meaning that we still see a white surface as a white surface. However, your camera is not that intelligent, and unless told otherwise, will record the orange or blue tones giving the colour cast to your images.
Left: The image captured using auto white balance has a heavy yellow tone from the artificial street lighting. Right: the same image, corrected for a ‘Tungsten’ white balance, giving the cooler tones on the stone work, and the bluer sky
As the colour temperature of different light sources is well known, there are a number of presets built into your camera that help to overcome the different colours of light in different situations – cooling the warm light, and warming the cool light – all in the cause of trying to capture the colours of the scene accurately. The ‘auto’ feature (auto WB or AWB) will attempt to predict the colour of the light by detecting the predominant colour of the scene and then countering it, however it may not necessarily make a correct decision, leaving you with inaccurate colours. Therefore it is best to set the colour balance before you take your image and just to make sure (note: the above image was a raw file giving me a lot of latitude for white balance correction. Jpeg files are not as susceptible to white balance adjustments, meaning the white balance correction needs to be made before the image is taken):
Daylight – To be used on clear sunny days. Bright sunlight, on a clear day is as near to neutral light that we generally get
Cloudy – To be used when shooting on a cloudy day. Adds warm tones to daylight images.
Shade – To be used if shooting in the shade, as shaded areas generally produce cooler, bluer images, so need warming up.
Tungsten – Used for shooting indoors, under incandescent light bulbs, or under street lights, to cool down the yellow tones.
Fluorescent – Compensates for the green/blue tones of fluorescent light strips when shooting indoors.
Flash – the flash will add a cool blue cast to the image, so used to add some warmth.
Practically speaking: avoid auto white balance and set the white balance manually. Generally, you will be able to look up at the sky and see what kind of day it is, and determine the colour balance required pretty easily. If you move indoors, just check the lighting that you are shooting under, and again select the appropriate white balance. It will soon become second nature to set it as you take your camera out of the bag.
4. Master Metering
Through out all of the above discussion, I have said that the camera calculates the exposure depending on the amount of available light, but what is it actually doing?
When taking a photograph, using any form of automatic exposure calculation (e.g. aperture priority mode, shutter priority mode, auto-ISO etc) the camera always tries to calculate an ‘average’ exposure. It will asses the entire scene, both light and dark areas, and determine the exposure so that all of the tones within the entire image average to 18% grey – called the ‘middle’ grey.
This is known as metering, and it is the reason that if you point your camera at a bright white scene, such as after it has snowed, and take a photograph the resulting image will always appear darker than you or I see it. Similarly, if you point your camera at a really dark scene, such as a low-lit room, and take a photograph the resulting image will always be brighter than you or I see it.
The scene is always being averaged by the camera and most of the time that results in the image appearing to be correctly exposed. However, you can control what areas of the scene are being assessed by the camera in order to influence the way in which the exposure is metered.
Generally, there are three metering modes that you can choose from:
Average – The camera will assess the tones across the entire image form corner to corner, and expose the scene to 18% grey from that assessment.
Center-weighted – The camera weights the exposure reading for the area in the center of the viewfinder that can total up to approximately 80% of the scene, ignoring the extreme corners of the image.
Spot metering – The camera will use a very small area of the scene, typically a small circle in the center of the viewfinder that totals approximately 5% of the viewfinder area. It will make the assessment of dark/light tones in this area and expose the entire scene to 18% grey, from that assessment


BUY NOW